Tips, tricks, and missing steps for the VMWare upgrade
Having done several small / medium business upgrades from vCenter and ESXi 5.5 to 6.0 and 6.5 and 6.7, I wanted to share some best practices and lessons learned with the IT community.
Table of Contents
vCenter
How long does it take to upgrade vCenter?
What is the risk of a vCenter upgrade?
Can I upgrade vCenter and ESXi remotely?
Before you upgrade vCenter, gather this information.
After upgrade to 6, vSphere client program stops working
After upgrade to 6, how do you Open Console to a guest VM?
Problem: Can’t connect to vCenter 5.5 appliance if it is 1+ year old
How to upgrade vCenter from 5.5 to 6.0 6.5 6x
Can I install vCenter without DNS?
What if vCenter is installed on Windows?
Upgrade fails, need to rebuild vCenter
Change password policy so that your accounts don’t expire
vSphere ESXi
How long does it take to upgrade a ESXi host?
What is the risk of a vSphere ESXi upgrade?
Problem: When I try to vMotion a guest VM, the option is grayed out
How to upgrade ESXi hosts using command line remotely
Fix: CPU Generation Compatibility Levels (read this BEFORE upgrading)
Problem: Can’t migrate vCenter after upgrade due to CPU compatibility
Fix: Conflicting VIBs error (HP servers especially)
Testing your hosts after upgrade
Conclusion
——————————–
Upgrade from 5.5 to 6.7 cannot be performed in one step
First, heads-up. You can’t upgrade directly from 5.5 to 6.7. You will need to upgrade to 6.0 or 6.5 first, then perform the jump to 6.7. The steps for vSphere ESXi are the same. vCenter can be a pain to upgrade. Check my other blog with step-by-step instructions for upgrading from vCenter appliance 6.0 (or 6.5) to 6.7.
——————————–
How long does it take to upgrade vCenter?
About 2-4 hours during the actual upgrade process. Figure one hour to deploy the appliance (no risk, original vCenter is unchanged), then another hour and a half to replace your existing appliance (your original vCenter is shut down). VMWare is very good about this process and will perform many system checks before shutting down your original vCenter. If something goes wrong at this stage, remember you can shut down (power off) the new vCenter and then start your old vCenter and it should recover.
Don’t forget the preliminary research, system checks, and preparation is another 4 hours for a small or medium business (this includes research for vSphere upgrades).
1-2 hours of the preparation is getting the images downloaded, either to your burned DVD or directly from the VMWare website.
——————————–
What is the risk of downtime while upgrading vCenter?
Good news: For small and medium businesses, there is almost no chance of customer impact while upgrading vCenter. Just don’t plan to do other management tasks at the same time. Remember that the hosts will keep running the VMs, the storage, and the virtual networking unchanged even if they can’t reach vCenter. DRS, HA and vMotion will not be available, so you won’t have normal redundancy.
As long as you complete your upgrade in a reasonable amount of time (one evening), you should be fine. What are the odds a host crashes in that 2-4 hour period? Generally extremely low (less than 0.1%) unless you have more than 5 hosts.
If you have 100+ hosts, then your odds of a server randomly crashing during the upgrade gets closer to 5%. But in that case, you should have a team of experts on the job, so you shouldn’t need much help from this lowly blogger <grin>.
——————————–
Can I upgrade vCenter and vSphere remotely?
You can perform this entire process (vCenter and ESX host upgrades) 100% remotely. Make sure you have a plan for what to do if a host doesn’t come back after rebooting. Ideally, you have an Integrated Lights-Out (iLO) module on your servers, which will allow you to restart them or power on/off remotely.
——————————–
Research before migrating or upgrading vCenter
Make sure you have deep-dived into the existing vCenter appliance and each host before starting.
Make sure to get the following configurations:
- Existing vCenter IP , verify root username and password (see next topic)
- Network basics (internal domain name, subnet mask, gateway, two DNS servers)
- Time provider (NTP). Make sure this matches the NTP source your hosts are using! This is a good time to standardize it across your environment.
- A ‘free’ IP address on the same subnet as your existing vCenter server. Will be used for a few minutes during the upgrade.
- Configure your DNS servers to have a fully-qualified name for vCenter (the old vCenter IP and your new vCenter’s name). For example: vcenter01.company.com . Make sure you can resolve it before you start the upgrade. The vCenter install (particularly new installs) will bomb out if you don’t have good DNS.
——————————–
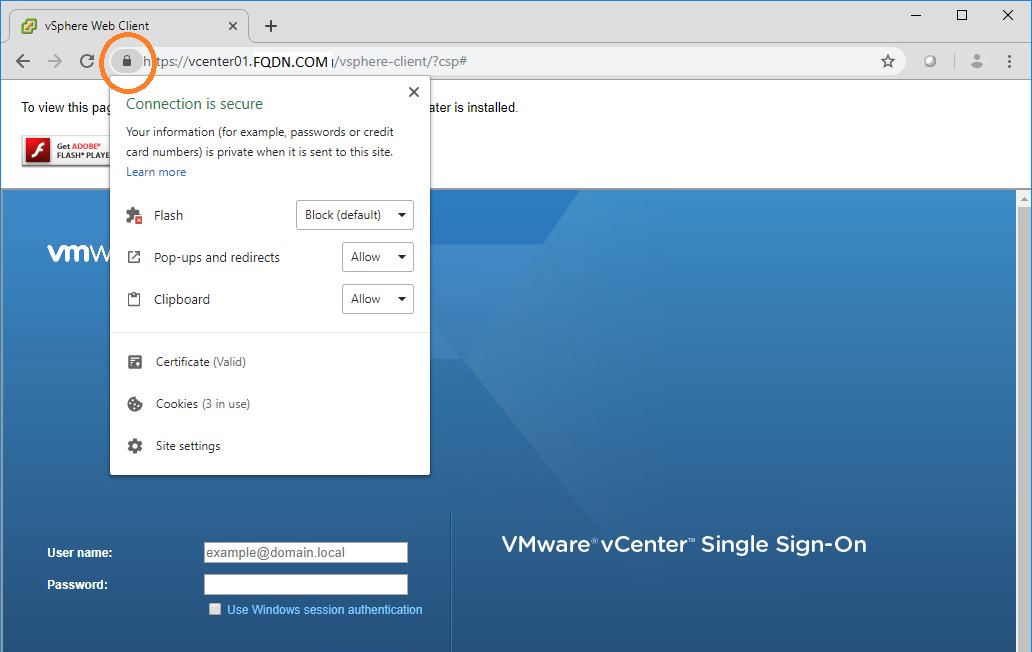
When you upgrade to vCenter or VMWare 6x, your vSphere Client (the program) will stop working! There is no client download on the website! How can you connect?
History: vCenter and vSphere 6x are designed to be managed with your web browser, using flash. VMware did this because there are all sorts of really niche configuration options that almost no-one uses. Adding the niche options to a website is easy. Adding them to the vSphere client is not. In version 5x, VMware put only basic functionality in the vSphere client and started offering niche options in the management website ( https://hostname:9443/vsphere-client ). In version 6x, VMware got sick of updating both the website and the vSphere client, so they stopped offering the vSphere client program. Nooo!
So now that you’ve upgraded to 6x, how can you connect and manage your virtual environment?
- Using Chrome, IE, or Firefox, make sure you have Flash installed. https://get.adobe.com/flashplayer/ (Personally, I use Chrome, so the rest of the instructions will match Chrome.)
- Navigate to https://vcenter_server_fqdn/vsphere-client
- or for a host.. https://host_ip_address_or_fqdn/vsphere-client
- Didn’t connect? Make sure you have a DNS entry for your vCenter server. This is a requirement for 6x
- Now you probably have a warning “To view this page ensure that Adobe Flash Player version x or greater is installed”. But you already installed Flash Player! What the heck, Chrome?
- You need to enable Flash each time you open the website for the day. Look for the lock icon in the address bar. Click on it and you will see Flash listed as blocked. Change it to Allow.
- You will be prompted to Reload the page. Do so. Now flash will work and you can log on. Default username for vCenter “vSphere Web Client”: administrator@vsphere.local . Default username for vSphere (individual host ESXi servers): root. In both cases, you should have been prompted to set the password during install or upgrade.
——————————–
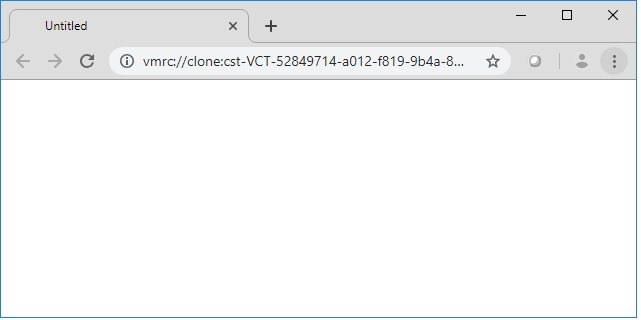
What about opening the Console to a virtual machine?
The console still works, but it now requires you to download a separate program Here is how to open console in 6.0 6.5 and 6.7.
You need to download the “VMware Remote Console” from the VMware website. It can be reached by … Downloads > vSphere > “Drivers & Tools” tab > VMware Remote Console.
Direct link: https://my.vmware.com/en/web/vmware/info/slug/datacenter_cloud_infrastructure/vmware_vsphere/6_7#drivers_tools
Expand VMware Remote Console then click Go To Downloads.
You will see separate installers for Windows (all Windows variants), Macintosh, and Linux systems.
You will need to log on with a VMware account – if you don’t have one already, just go ahead and register for the free account.
Download and install the remote console on your computer. No reboot necessary.
Next time you select “Open Console” from the vSphere / vCenter web client, it should prompt you to open the link with a program. Select the VMRC (Vmware Remote Console).
Your VMRC console should now open and you can interact with the desktop.
In 2017 and early 2018, the remote console was terrible with jumpy mouse, mouse disappearing, or offset mouse issues. The remote console has since been updated and works very well with all the operating systems I’ve tried (CentOS, Ubuntu, RedHat, Windows Server 2012, Server 2016, etc.
Installing VMware tools on the guest VM will normally help with sync issues.
Remember, if your mouse or keyboard get ‘stuck” in the console session (normally this only happens with pre-boot environments), just press left-CTRL and left-ALT at the same time.
——————————–
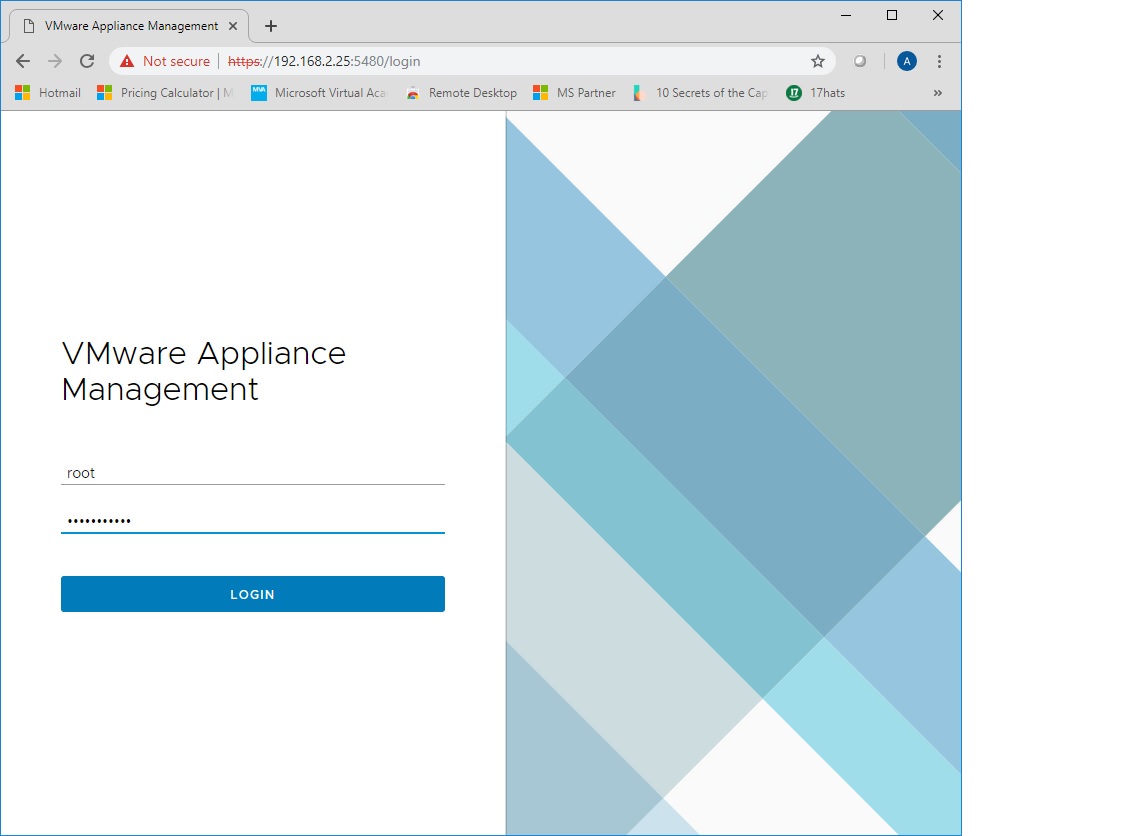
Problem: Can’t log onto the old 5.5 vCenter appliance
Symptom: You are pretty sure you know the root password, but it is not working on the web GUI. ( https://vCenterIP:5480 ) It says wrong password.
Symptom: The 5.5 vCenter appliance was built more than a year ago.
Fix: Connect to vCenter using SSH
(I recommend using the Putty SSH application which is available at this link). After connecting, when you enter ‘root’ and the correct password (default is ‘vmware’ but you’ve probably changed it), you will be told that the password is expired. Change the password using the SSH dialogue and now you can log on to the web GUI.
Cause: When you build a vCenter appliance (5.5, 6.0, or 6.5 or 6.7), by default, the system expires the root account after one year. I recommend un-checking this immediately whenever you build vCenter. If you want to change the root password periodically, you can still do it, but this way your department won’t get locked out.
——————————–
How to upgrade vCenter from 5.5 to 6.0 or 6.5
I personally recommend deploying 6.5 vCenter appliances (rather than deploying vCenter onto a Windows server).
The first step to upgrading is to perform a snapshot of your vCenter virtual machine. If you quiesce guest memory and something goes wrong during the upgrade, you can revert to the snapshot and everything will be working again within 5 minutes. This truly can be depended upon. Make a reminder to remove the snapshot after everything is stable.
Stage the upgrade
- Note: You will need a valid VMware account. These steps are performed on a Windows 10 administrative workstation.
- Here is the link to download vCenter: https://my.vmware.com/web/vmware/info/slug/datacenter_cloud_infrastructure/vmware_vsphere/6_5
- Adjust the version selection as necessary. Make sure that your vCenter is the same or HIGHER version as your ESXi servers.
- Find the VMware vCenter Server Appliance , file type: iso ( about 3-4 GB) and download it.
- Mount the ISO by right-click, Open With, Windows Explorer.
- The files will appear in your DVD drive letter in Windows Explorer.
- Navigate to \vcsa-ui-installer\win32\installer.exe and start it
- vCenter appliance installer will display. Click Upgrade.
Here is a helpful video that describes pre-requisites and has step-by-step instructions to perform the upgrade. Text steps continue below.
vCenter Appliance Upgrade Stage 1
- Upgrade Stage 1: Deploy Appliance – Introduction displays. Click Next
- Upgrade Stage 1: Deploy Appliance – License agreement displays. If you want to proceed, click Accept and Next.
- Upgrade Stage 1: Deploy Appliance – Source Appliance displays. Identify your Source Appliance (your existing vCenter 5.5 server) and provide credentials to access it. The default HTTPS port 443 is correct unless your environment has changed it (this is unlikely). The SSO User Name is normally administrator@vsphere.local , but this could be any full administrator account. Appliance (OS) root password refers to the root password for the vCenter 5.5 appliance. The root account can be tested by opening website to the vCenter 5.5 server https://vCenterIP:5480 or connect via SSH to the server.
- You have a choice to specify either the ESXi host or vCenter server that manages the source appliance. It is recommended to specify the ESXi host, not the vCenter server, in that box. You can specify by IP or DNS (IP is less likely to have issues).
- Click Next
- Upgrade Stage 1: Deploy Appliance – .Specify deployment type displays – Embedded Platform Services Controller is appropriate for environments with 1-20 vSphere ESXi servers. If you aren’t sure, and you have less than 20 hosts, go for Embedded. If you have more than that, do some research to see what is best for your environment.
- Upgrade Stage 1: Deploy Appliance – Appliance deployment target displays. Enter the ESXi host IP address or DNS that you want to host the new vCenter server. This can be the same ESXi host as is already hosting (make sure you have at least 10 GB of RAM available on it), or a different one. You will need to specify the username and password for the ESXi host.
- Upgrade Stage 1: Deploy Appliance – Select folder displays. You can put the new vCenter server into a logical folder in your environment.
- Upgrade Stage 1: Deploy Appliance – Select Compute Resource displays. You can choose which ESXi server runs the new vCenter server.
- Upgrade Stage 1: Deploy Appliance – Set up target appliance VM displays. You can assign a name to the new vCenter server and give it a root password. Take note of this username and password – you will need it to manage the new vCenter server in the future.
- Upgrade Stage 1: Deploy Appliance – Select deployment size displays. Look up the number of VMs you are running in the table, and pick your vCenter size based on it. Most environments qualify for Tiny, with less than 10 hosts.
- Upgrade Stage 1: Deploy Appliance – Select datastore displays. Pick a datastore that has space to hold the server size you picked in the last step (Tiny = at least 250 GB free).
- Upgrade Stage 1: Deploy Appliance – Configure Network Settings displays. Pick the VM network from the list that is the same as your old vCenter server and assign a temporary IP address on the same subnet as the old vCenter server. Your admin workstation needs to be able to communicate with this IP address as well.
- Upgrade Stage 1: Deploy Appliance – Ready to complete stage 1 displays. Click Finish to run the deployment. It should complete Stage 1 in about 30 minutes or less.
- Click Continue to proceed to Stage 2
Note: If you get an error communicating with the new vCenter at this point, your workstation is having trouble reaching the new server over the network. Did you assign the VM to the correct virtual switch? Did you give it an IP address that can route on that subnet?
Stage 2 of the vCenter Appliance Upgrade
- Upgrade Stage 2: Introduction displays. Click Next
- Upgrade Stage 2: Pre-upgrade check result displays. Warnings may display, depending on how your vCenter 5.5 server is configured. Recommended resolutions will also display. You can close the results after reading through them.
- Upgrade Stage 2: Select upgrade data displays. I recommend copying everything from the source to the new vCenter, but if you are worried about space, just move the configuration. The events, tasks, and performance metrics are just for audit purposes.
- Upgrade Stage 2: Configure CEIP displays. Depending on your company policy, join or do not join VMware’s Customer Experience Improvement Program. Most security conscious businesses or government agencies will not join the CEIP.
- Upgrade Stage 2: Ready to complete displays. Click Finish when ready.
- Data transfer and setup runs – this will take up to 45 minutes normally. When finished, you can click the Close button to finish the wizard.
- Now you can log on to the new vCenter and check it out! https://vCenter_IPaddress/vsphere-client
——————————–
Can I install vCenter without DNS?
YES.
Check out this blog I wrote on how I installed vCenter 6.7 without DNS.
How to install vCenter 6.7 (and 6.0 and 6.5) with no DNS, only IP address
——————————–
What if you have a Windows-based vCenter appliance?
Especially if you have update manager installed? This can get ugly. The basic steps are to install the vCenter update then install the Update Manager update. But, occasionally, vCenter will start acting really buggy and the client crashes. The good news is that you can roll back to the latest snapshot of vCenter (you did snapshot it with quiesce memory before the upgrade , right?) and it will go back to normal, the bad news is that you probably will need to rebuild vCenter or call VMware if you have a problem.
——————————–
Upgrade fails, need to rebuild vCenter
If your vCenter deployment is a typical medium or small business size, re-building your vCenter from scratch is actually faster than troubleshooting it, and doesn’t involve downtime. 90% of the configuration is held on the hosts, including datastores, virtual switches, and VMs. Make sure to spend 10 minutes looking at your old vCenter and screenshot the following:
- License keys
- User accounts and any custom permissions
- Network settings for vCenter server
- NTP settings
- HA and DRS settings
- CPU compatiblity settings
- Keep-away and custom rules settings
- If you use distributed switches or other advanced items like NSX and vSAN, rebuild at your own risk. Make sure you’ve really captured the configuration steps before you proceed.
Once you have the config’s captured, just turn off your old vCenter and build a new appliance from scratch. Set up your clusters and licensing, then add each host. Everything should come in correctly. Make sure to re-connect your backup programs to the new vCenter afterward.
Hint: You can install vCenter at 6x directly. No need to install a 5.5 version.
——————————–
How to set password policy so that you don’t get locked out
One of the first things you should do is change the password policy on your vCenter so that the accounts do not expire after 90 days. If you require a password to be complex (meaning 14+ characters long), you shouldn’t need to expire it for years and years.
To view or change the policy:
- Log on to vCenter https://vCenterName.domain.etc/vsphere-client with administrator@vsphere.local
- From the Home menu (icon looks like a house), select Administration
- Under Single Sign On, select Configuration
- Select Policies, then Password Policy, then click edit.
- To set passwords to never expire, change the Maximum lifetime to 0.
- I also recommend increasing the maximum length to 16, reducing the character requirements to 1 each, and limiting the identical adjacent characters to 3.
- Click Save to save changes. These changes are global to all _______@vsphere.local accounts.
——————————–
vSphere ESXi upgrades from 5.5 to 6.5 or 6.7
Before you upgrade your ESX hosts, take a quick read through the rest of the topics below. There are lots of good tips and things to avoid.
——————————–
How long does it take to upgrade an ESXi host?
Do you have a shared SAN with 10gbps storage networking??? It is normally about 1.5 hours per host to perform the upgrade.
Are your VMs stored on the local hard drive of the ESXi hosts? It will take # minutes to vMotion the VMs to another host, + 1 hour. In many cases, it is more efficient to power off all VMs and perform the upgrade, then power the VMs back on, if you are using local storage.
You can save time by upgrading multiple hosts at once. This of course requires either powering off the guests or having enough extra resources to host them on the other servers.
Here is the time breakdown I use:
10 minutes: vMotion all guests off the host (this assumes you have fast shared storage). Or power-off the guests.
2 minutes: Put the host into maintenance mode
5 minutes: Enable SSH in services. SSH into the host and perform pre-upgrade scripts.
30 minutes: Download and install the latest image from VMware repository (requires Internet)
15 minutes: Reboot the host and wait for the server to load back into the ESXi operating system fully.
20 minutes: Apply SPECRTRE / MELTDOWN setting and reboot again ( only if you haven’t patched in a while).
5 minutes. Disable SSH in services. Take the host out of maintenance mode.
10 minutes: vMotion a non-critical guest to the host and test functionality.
10 minutes: Finish vMotioning other guests to the host (or power on the guests).
——————————–
What is the risk of downtime for ESXi upgrades?
The first question is: Are all your hosts running the same model of hardware?
- If YES… then your risk is almost nil.
- If NO… your hosts are running different hardware models (such as a Dell R710 and a HP DL360 gen8 and a HP DL360 gen9), then your risk of downtime or customer impact is pretty high. Read through the topic below, “CPU Generation Compatibility Levels” before you continue.
Next question: Do you have enough RAM and disk space to run all your VMs on (HOSTS – 1) ?
Figure this out ahead of time. Many companies have a few high-resource VMs such as database servers, which take up all or most of the resources on a host. Plan how you will migrate the VMs around so that all the VMs will fit onto your other servers. Note: You CAN overallocate RAM on ESXi hosts. They will page the less-used memory to disk. This normally won’t hurt performance much as long as you don’t over-allocate too many resources. Here is a (very) technical article about overallocating memory and CPU on VMware: https://labs.vmware.com/vmtj/memory-overcommitment-in-the-esx-server
If you properly migrate your VMs off each host, putting it into maintenance mode, before upgrade, you should be good. I still recommend doing this portion after-hours so that you minimize impact from vMotion and have the maximum amount of redundancy during the workday in case one of your hosts randomly fails.
——————————–
Problem: When I try to vMotion a guest VM, the option is grayed out?
Normally this issue is because the VM is changing in some way. For example, it might be migrating somewhere already, or you just modified the hardware settings and it is still saving, or you just powered it on, etc. Another possibility is that your Veeam is performing a backup of that VM.
If Veeam backup is occurring (you can tell by looking at the current Snapshots), wait for the Veeam backup to complete, or cancel it.
If a fast task like changing settings is running, wait for it to complete.
If you can’t find the cause, try shutting down the VM and powering it back on. Sometimes that clears the issue. Obviously not the ideal answer.
——————————–
How to upgrade ESXi hosts using command line remotely
For this procedure, you WILL need Internet access from the host. If you have a decent business ISP, it should take less than 20 minutes to download the update.
1. vMotion or power-off all VMs off the host. Note: you may need to disable automatic load balancing in your cluster if the VMs are automatically migrated back.
2. Put the host into Maintenance Mode
3. Start the SSH service on the host ( Configuration > Security Profile > Services > Edit )
4. SSH to the host ( I use the Putty program which is freely available on the internet)
5. Log on as root
6. Perform this command to enable downloads from the VMware Internet repository”
esxcli network firewall ruleset set -e true -r httpClient
7. Determine which version of ESXi you want to update to.
IMPORTANT: Never update your ESXi version higher than your vCenter version!! If you do, your vCenter will disconnect the hosts!!!
Reference this VMware KB article for ESXi versions available. You should be able to match the release name to one of the updates available from the VMware Internet Repository.
For example: When I check my vCenter version in the Appliance website ( https://vcenter.fqdn.com:5480 , update tab), I see my vCenter is version “6.5.0.23000 Build Number 10964411” with a Release date of November 29, 2018.
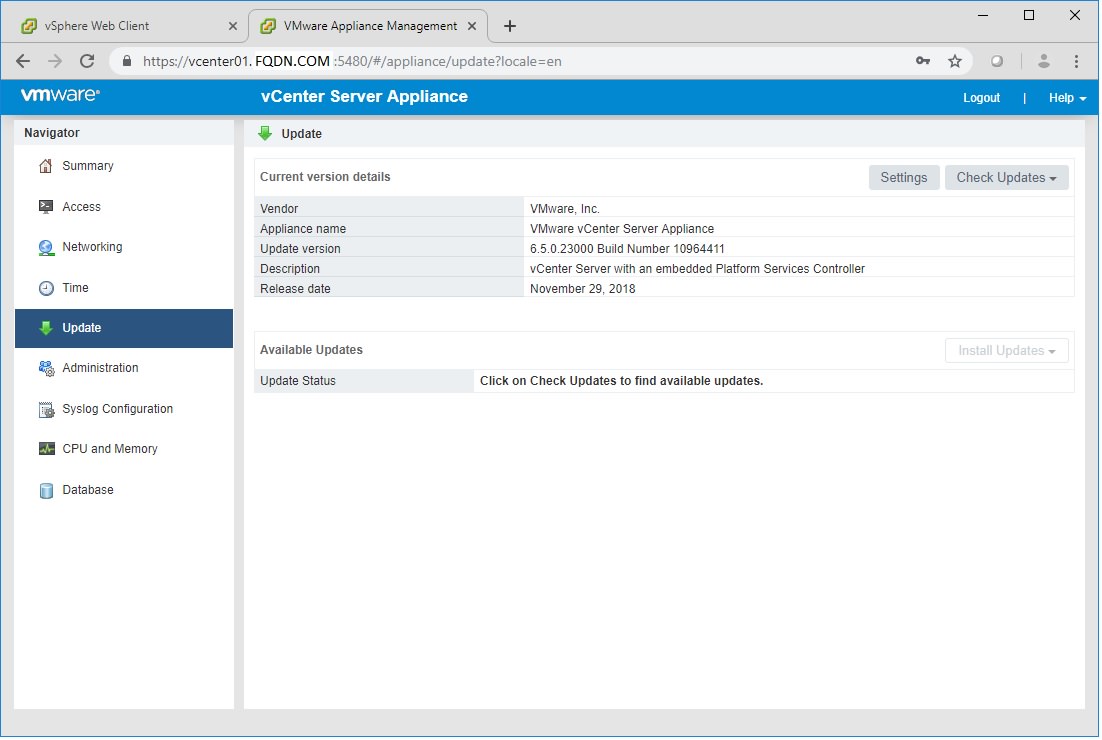
I look up the VMware patch table and decide I want to download ESXi 6.5 EP 11 which was released November 9, 2018 and has a slightly lower build number than my vCenter server.
| Version | Release Name | Release Date | Build Number |
| ESXi 6.5 EP 11 | ESXi650-201811001 | 11/09/2018 | 10719125 |
Perform this command in SSH to see what versions of ESXi are available from the VMware Internet Repository:
esxcli software sources profile list -d https://hostupdate.vmware.com/software/VUM/PRODUCTION/main/vmw-depot-index.xml | grep ESXi-6
Note: You can modify this command to specify version ESXi 6.5 or 6.0 or 6.7 by editing the “grep ESXi-6” portion of command.
Example, for version 6.5:
esxcli software sources profile list -d https://hostupdate.vmware.com/software/VUM/PRODUCTION/main/vmw-depot-index.xml | grep ESXi-6.5
Example, for version 6.7:
esxcli software sources profile list -d https://hostupdate.vmware.com/software/VUM/PRODUCTION/main/vmw-depot-index.xml | grep ESXi-6.7
Review the list for the version you want. Copy the package name to your clipboard. The package name will look like ESXi-6.#.#-########-standard
When I perform the query in SSH, I see packages that match the release name:
ESXi-6.5.0-20170304101-standard VMware, Inc. PartnerSupported
ESXi-6.5.0-20171201001s-standard VMware, Inc. PartnerSupported
ESXi-6.5.0-20170304101-no-tools VMware, Inc. PartnerSupported
ESXi-6.5.0-20181101001s-standard VMware, Inc. PartnerSupported
ESXi-6.5.0-20180604001-no-tools VMware, Inc. PartnerSupported
ESXi-6.5.0-20180502001-no-tools VMware, Inc. PartnerSupported
ESXi-6.5.0-20171204001-no-tools VMware, Inc. PartnerSupported
ESXi-6.5.0-20170304001-standard VMware, Inc. PartnerSupported
ESXi-6.5.0-20181104001-no-tools VMware, Inc. PartnerSupported
ESXi-6.5.0-4564106-no-tools VMware, Inc. PartnerSupported
ESXi-6.5.0-20181101001s-no-tools VMware, Inc. PartnerSupported
ESXi-6.5.0-20181103001-no-tools VMware, Inc. PartnerSupported
ESXi-6.5.0-20180501001s-standard VMware, Inc. PartnerSupported
ESXi-6.5.0-20170304001-no-tools VMware, Inc. PartnerSupported
Since I want the full package including latest VMWare tools, I pick the package named “-standard”.
8. I then run the UPDATE command, adding the package name to it.
esxcli software profile update -d https://hostupdate.vmware.com/software/VUM/PRODUCTION/main/vmw-depot-index.xml -p PACKAGE_NAME_FROM_REPOSITORY
Example:
esxcli software profile update -d https://hostupdate.vmware.com/software/VUM/PRODUCTION/main/vmw-depot-index.xml -p ESXi-6.5.0-20181101001s-standard
After about 5 minutes (depending on your internet connection), you should get a successful message.
Update Result
Message: The update completed successfully, but the system needs to be rebooted for the changes to be effective.
Reboot Required: true
VIBs Installed: VMware_bootbank_esx-base_6.5.0-2.71.10868328,………,………,………,………,………,………,………,………,………
9. Type reboot in SSH to reboot your host.
10. Wait for the reboot to finish. Generally, I just wait for vCenter to show that the host is back online.
11. SSH back into the host, logging on as root. Note: If SSH doesn’t connect, you may need to re-start the SSH service in Security Profile.
12. Disable downloads from the VMware Internet repository by running this command:
esxcli network firewall ruleset set -e false -r httpClient
13. Take the host out of Maintenance Mode
14. vMotion or power-on a non-critical guest VM to this upgraded host.
15. Test functionality of the non-critical VM (especially check the ability to ping it, which is a good all-around test of host, network, and VM)
16. vMotion or power-on the other VMs to the upgraded host.
17. Stop the SSH service on the host (Configuration > Security Profile > Services > Edit )
18. Continue upgrading other hosts.
If you need more information, here is a longer guide for upgrading ESX 5.5 to 6.x using command line by Deflounder.
https://derflounder.wordpress.com/2015/04/19/upgrading-from-esxi-5-5-to-esxi-6-x-via-ssh-and-esxcli/
——————————–
Problem: CPU Generation Compatibility Levels
This is a big concern because if you don’t avoid it in advance, you will have to shut down some VMs in order to complete the ESXi hosts upgrade.
If you have more than one model of server, deep dive on this BEFORE you start upgrading ANY hosts.
Symptoms
- You have older hosts mixed in with newer servers.
- After upgrading a host to vSphere 6.0 or 6.5, you cannot vMotion your VMs to it. “The virtual machine requires hardware features that are unsupported or disabled on the target host. General incompatibilities. If possible, use a cluster with Enhanced vMotion Compatibility (EVC) enabed, see KB article 1003212.“
Root Cause
vCenter 5.5 seems to handle CPU compatibility without any configuration steps. Later versions need to be configured for this before you turn up hosts.
In vCenter 6.0 and 6.5 and 6.7 , you need to set up a Cluster object and put your hosts into it in order for Enhanced vMotion Compatibility to work across CPU generations. But you can’t do this while your host has any VMs running. If you upgrade then move your VMs onto the host without setting up the cluster object, you will have issues vMotioning the VMs to other hosts later.
Fix: Set up cluster in vCenter, configure CPU compatibility levels to the lowest common denominator, and add your newest host to it early.
- For each of your hosts, look up their CPU generation against this chart on VMWare KB: https://kb.vmware.com/s/article/1003212
- After upgrading vCenter, but before upgrading hosts, create a cluster object (right-click the datacenter, New Cluster)
- After naming the cluster, right-click it and select Settings.
- Select the “VMware EVC” tab in settings. Enable it, and select the lowest (oldest) CPU generation for all of your hosts.
- Starting with your newest hosts (the highest generation), move them into this cluster after upgrade but before migrating VMs back onto them.
For example, I will upgrade ESX05 first because it has the highest CPU generation.
- (I have already upgraded vCenter to 6.5)
- Create a cluster object and configure CPU compatibility at the LOWEST common level
- vMotion all VMs off ESX05 to older hosts.
- Put ESX05 into maintenance mode in vCenter
- Install ESXi 6.5 on this host
- Re-add ESX05 to vCenter if needed.
- Move ESX05 into the compatibility cluster while it is in maintenance mode with no VMs.
- Configure and thoroughly test ESX05 (see topic below).
- Take ESX05 out of maintenance mode
- vMotion some VMs onto ESX05, in preparation for upgrading ESX04 (the next lower generation server) next.
If you do this right, you should be able to avoid customer impacting downtime.
Problem: Did you miss the CPU compatibility fix and already vMotioned some VMs into an upgraded, newer host?
Sorry. You are stuck with a situation where you can’t get your last host(s) into the compatibility cluster because you have live VMs on it and you can’t vMotion the VMs to any other host. This is not an acceptable stopping point because you lose cluster benefits like DRS and also can’t vMotion for regular maintenance in the future. So bite the bullet and fix it now, rather than wait until you are forced to do it in the future.
- If you get stuck in this compatibility hell, then the easiest solution is to shut down all the VMs on that host then move the host into the cluster. This normally results in a downtime of about 10-15 minutes, depending on how fast your VMs boot up.
- Here is some more information from a fellow blogger: https://tinkertry.com/easier-way-to-vmotion-to-incompatible-cpu-host
——————————–
Problem: Did you upgrade the host with vCenter on it, and now you can’t migrate without shutting down vCenter?
How to fix vCenter vMotion CPU compatibility issue:
Here is the situation. You are trying to vMotion your vCenter to another host, but you get an error about CPU compatibility. Errors like “The virtual machine requires hardware features that are unsupported or disabled on the target host” “If possible, use a cluster with Enhanced vMotion Compatibility (EVC) enabled; see KB article 1003212″ ” CPUID details” “incompatibility at level 0x1 register ‘ecx'”. “FMA3 is unsupported” “MOVBE is unsupported” “RDRAND is unsupported”
The normal fix is to power off the VM momentarily, vMotion it, then power it back on. During power-on, it will use the new host’s CPU capabilities.
But with vCenter, you can’t do this, because you are using vCenter to perform the vMotion, so powering it off means you can’t communicate with both hosts at once.
Shared storage fix:
If you have shared storage (both hosts can reach the same datastore), you can use VMWare’s instructions to fix the problem. Essentially, you make sure the vCenter server is on shared storage, then you connect to each host’s vSphere website directly. Power vCenter off and remove it from inventory (no delete!!!!) on the first host. Then Add vCenter to inventory on the second host and power it on.
No shared storage? Using local disk / datastore for each host?
This is how I’ve fixed it.
- Using vCenter, with vCenter powered on, I right-click the existing vCenter server and Clone it to the second host’s datastore. Note: Name the clone something you are happy to use permanently)
- Wait for the clone to finish, (the clone will be powered off).
- Open the vCenter management website ( https://vcenterURL:5840 ) and log on to it
- In another tab, open vSphere website to the second host (that has the clone) and log on to it.
- Right-click the clone vCenter and Power On
- Immediately Shut Down the original vCenter using the management website.
- Wait for about 10 minutes, then attempt to connect to vCenter normally. You should be working from the clone now.
- Once you feel comfortable, delete the old vCenter.
Something went wrong?? Rollback instructions:
- If the clone vCenter doesn’t work, just shut it down using the second host’s vSphere website.
- Connect to the first host’s vSphere website and power on the original vCenter.
——————————–
Problem: Conflicting VIB Error (HP Servers especially)
Wrote a post about how to solve this issue last year. You can find it at this link here.

——————————–
Testing your hosts
You can avoid 99% of the risk by testing your upgraded host thoroughly before you put production VMs onto it.
I recommend the following tests (at minimum)
- Make sure you’ve got your upgraded host configured, into vCenter, and into it’s destination cluster.
- Using a test VM (build one up if you don’t have one ready), test connecting to each virtual switch and pinging to-and-from other servers across the network.
- Storage vMotion the test VM to each major storage system you have.
- vMotion (processing) the test VM between your upgraded host and other hosts. Test both directions.
- Snapshot and delete snapshot on the test VM.
And before you close this project, make sure to re-connect your backup jobs and test them.
——————————–
Good luck in your upgrade process!
(shameless self promotion) By the way, I consult on VMware, Storage Area Networks (such as Netapp, Synology, FreeNAS), high availability designs, and migrations to the cloud. I offer 30 minutes of free technical advice on these topics: if we can solve your problems in that time, great! If the problem is too big, we can start working on a plan together. Please schedule using the button below! – Amira Armond, President, Kieri Solutions
![]()
![]()
What snags did you run into during your VMware upgrade? Please share your lessons learned and problems-averted