Many websites will say that vCenter 6x requires DNS lookup, but these steps and screenshots prove that you can install a new vCenter 6.7 with only an IP address and no DNS.
Start vCenter install from .iso file using Windows 10
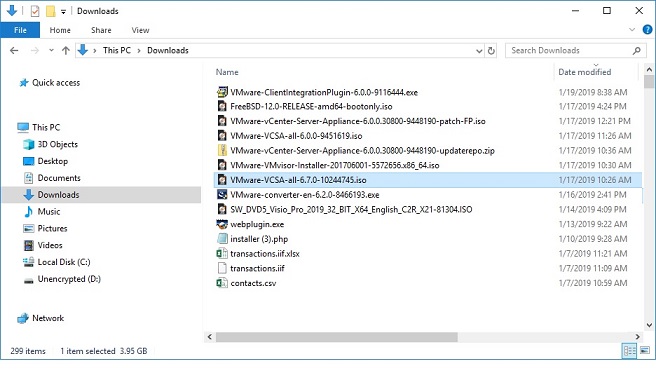
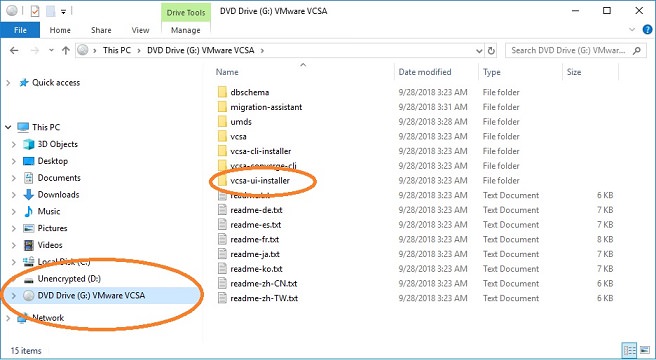
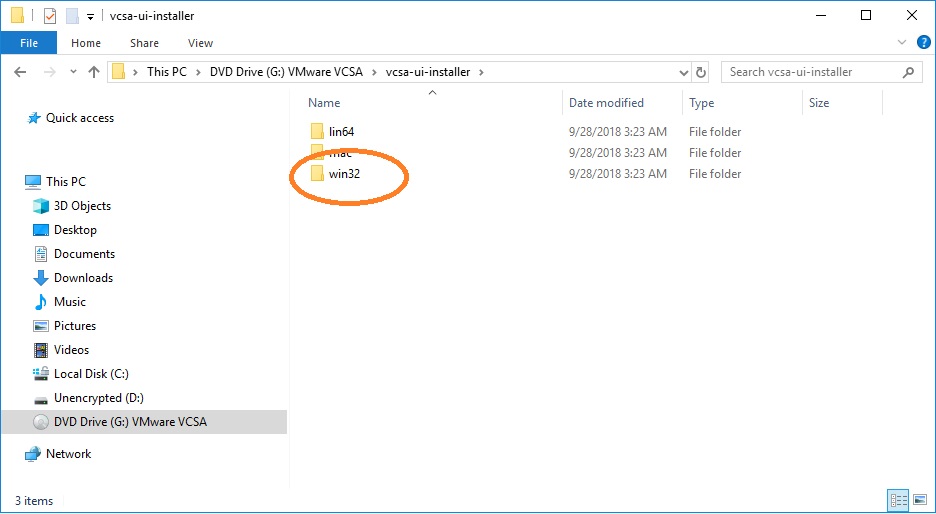
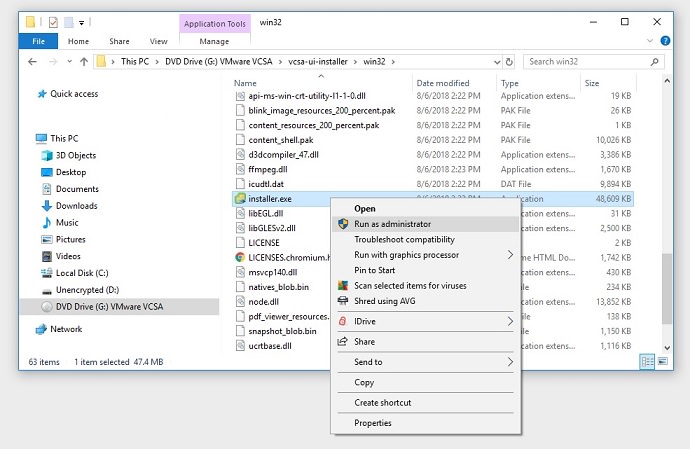
1. Download the install .iso file for your vCenter (available from the downloads area of vmware.com. On a Windows PC (I am using Windows 10), double-click the .iso file to mount it. It will show up in a virtual DVD drive.2. Open your virtual DVD drive and expand the vcsa-ui-installer folder.3. Expand the win32 folder (for a Windows PC). If you are using Linux or Mac as your desktop, select the appropriate folder.4. Run the installer.exe file as administrator (on Windows). This will start the program that allows you to deploy, upgrade, or migrate vCenters.
vCenter install stage 1
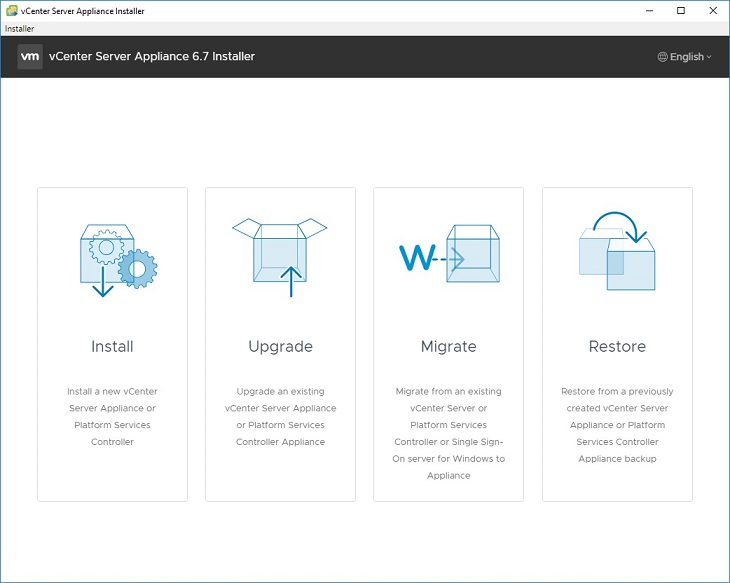
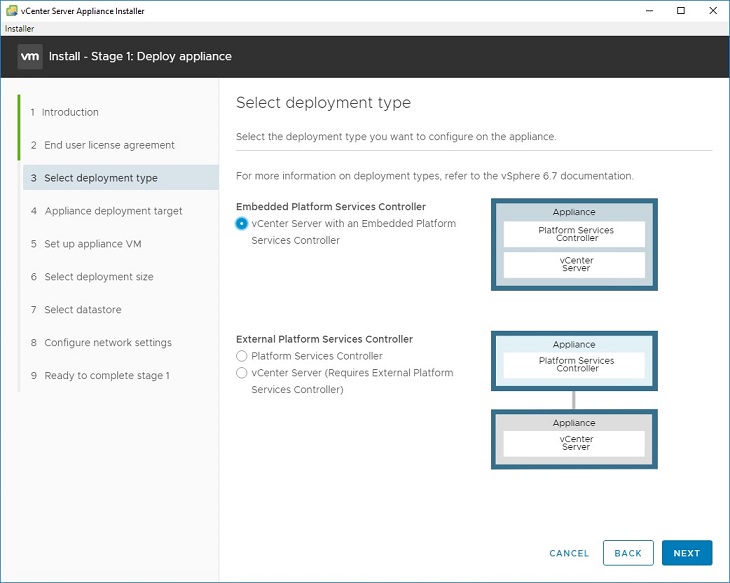
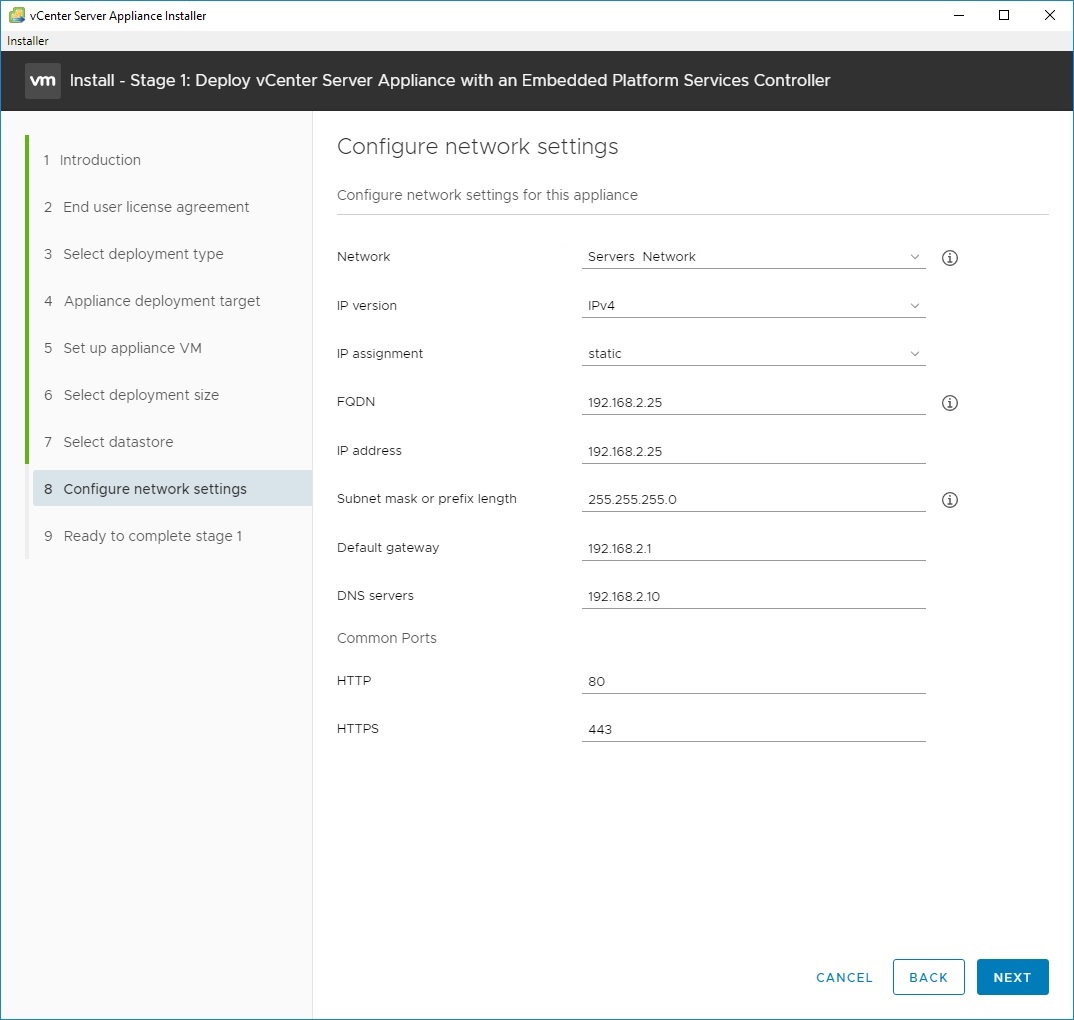
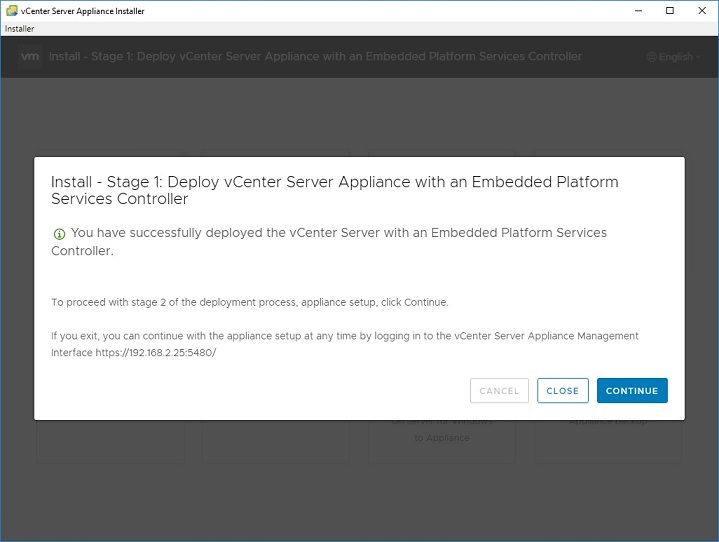
5. Initial options display. In our case, we are installing a brand new vCenter with no DNS, only IP address. So pick Install.6. Go through the introduction and end use license agreement. For the deployment type, select Embedded Platform Services Controller (this is normally the correct choice unless you have a very large, complex environment)7. Normally you will be installing a new vCenter directly onto an ESXi host. Put the IP address of your ESXi host into the “ESXi host or vCenter Server name”. Leave the port 443, enter the correct root account and password for that ESXi host. 8. Configure options for “set up appliance VM” — this gives the name for the VM on your host (and will affect naming of the datastore folders). Set the root password for the vCenter appliance here. Select deployment size – for most situations, the default of Tiny is fine unless you have more than 10 hosts. Select datastore – pick the datastore to create the VM into.9. Configure network settings: Here is the important part. Network should be a virtual port group (switch) that your desktop can communicate with. IP assignment should be static. In the FQDN field, enter the IP address of your vCenter server. In the IP address field, enter the IP address of your vCenter server. Enter the rest of the fields as appropriate for your environment. If you don’t have a DNS server at all, use your gateway or another bogus IP.10. Confirm your settings and start deployment. For me, I was able to complete Stage 1 in about 15 minutes, despite using a slow (100mbps) network.
vCenter installation stage 2
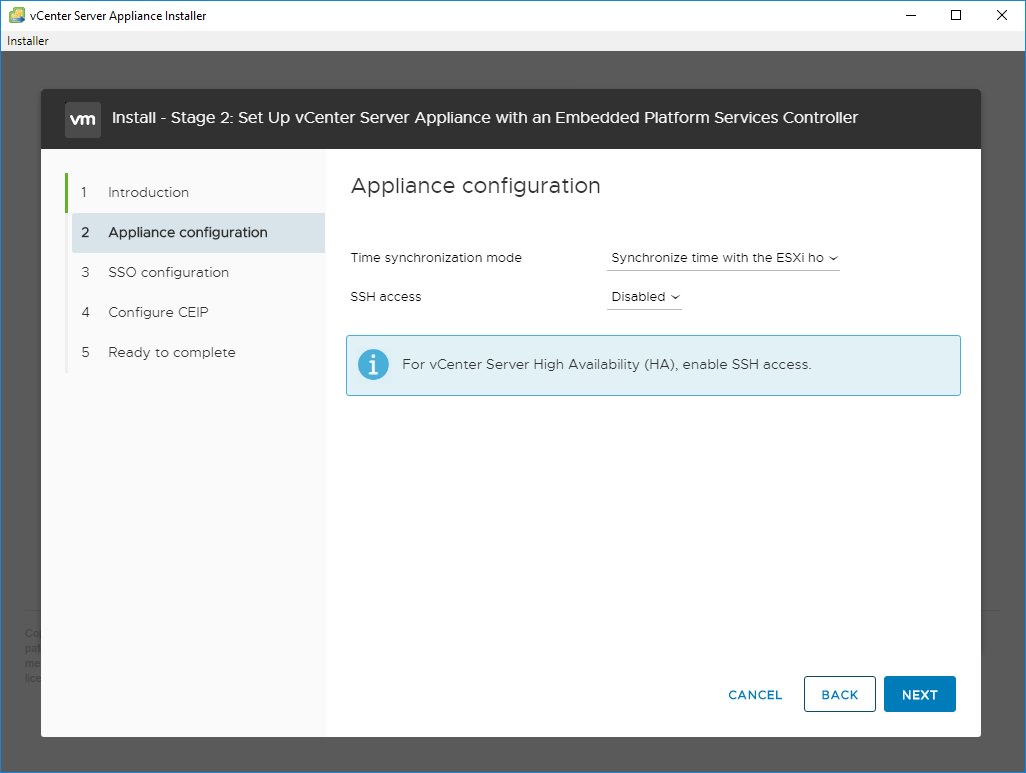
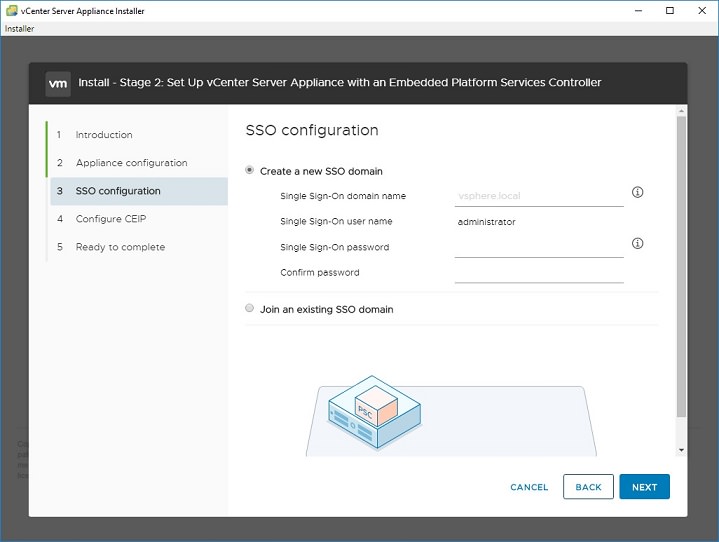
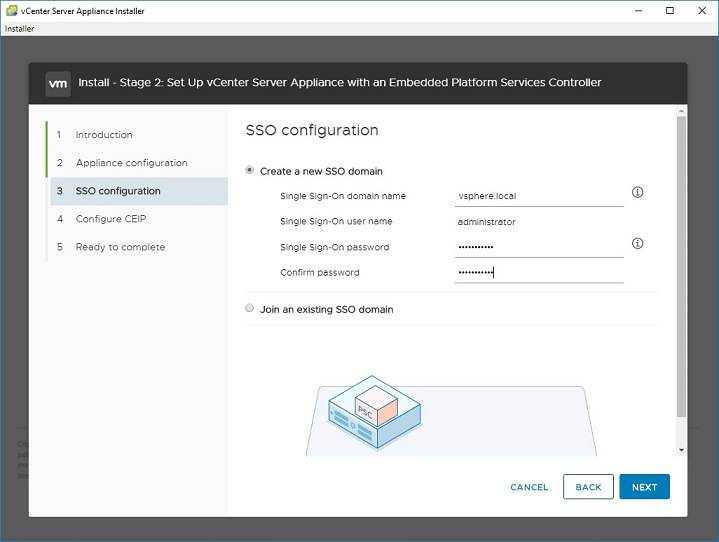
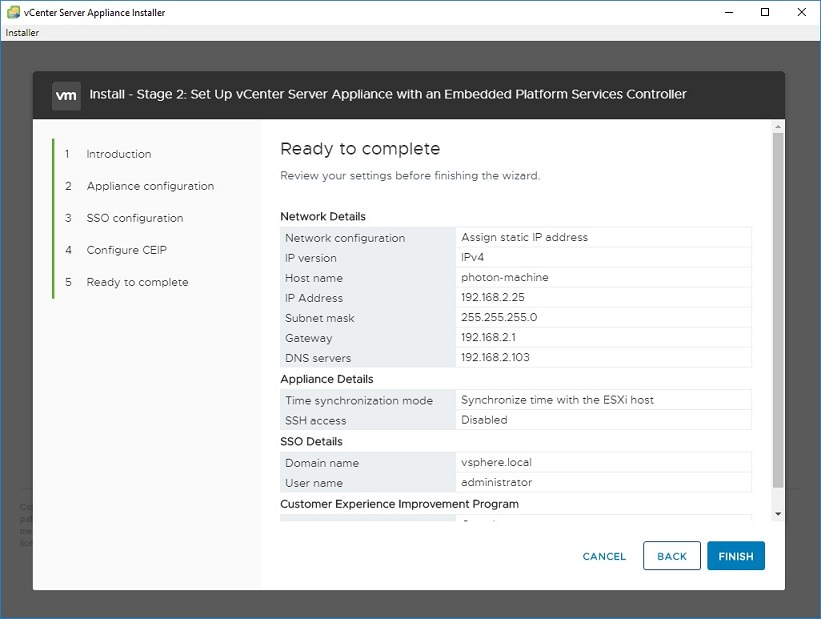
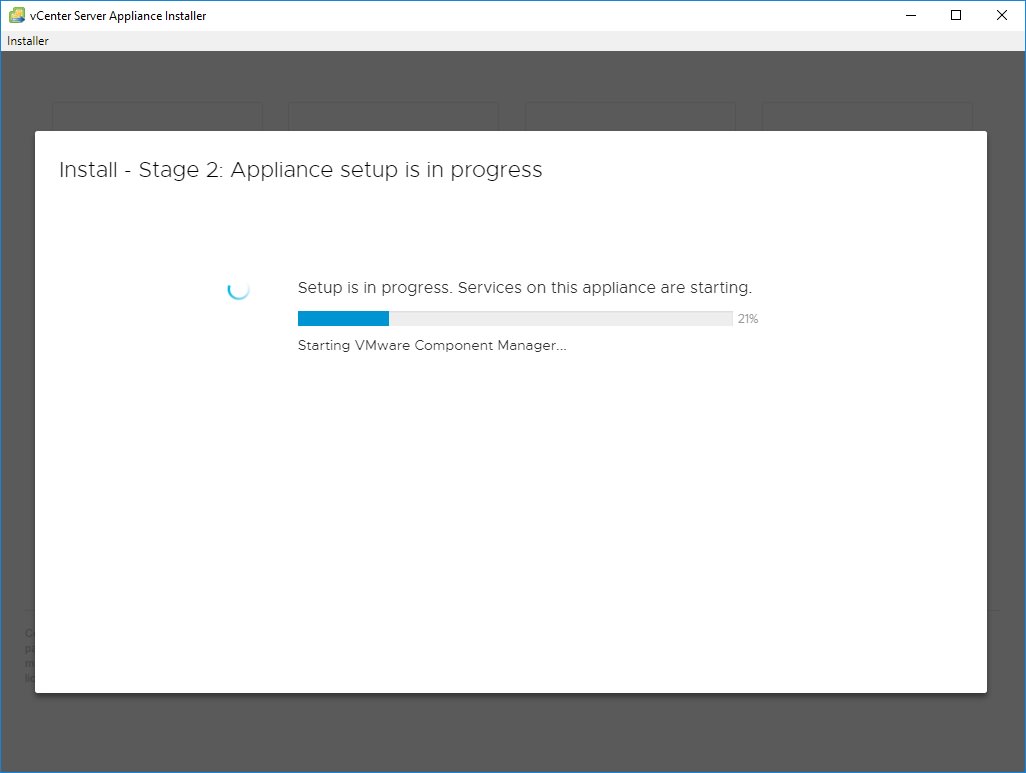
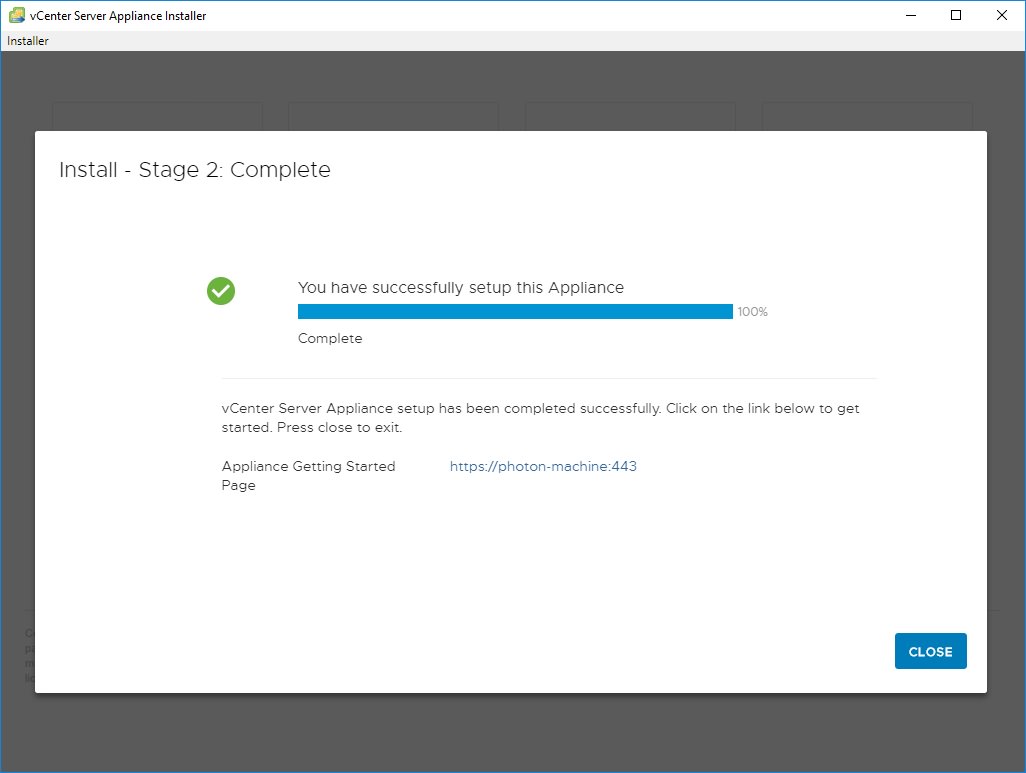
11. Stage 2 starts. If you have an NTP server, set it here, otherwise make sure your ESXi host has correct time and use it.12. Most deployments create a new SSO domain.13. Enter “vsphere.local” into SSO domain name, enter a password for administrator. Your logon username will be administrator@vsphere.local with the password you set.14. Select whether you want to participate in the Customer Experience Improvement Program (secure facilities say no). Then review your settings and Finish to start configuration.15. How long does it take to complete Stage 2, Appliance setup? For me, it took 10 minutes. If it takes more than 45 minutes, your deployment is probably failing.16. Stage 2 completes. Note that the link assumes you are using DNS. It won’t work unless you have updated your HOSTS or put an entry into your DNS server. Since we are avoiding DNS, lets just say it won’t work.
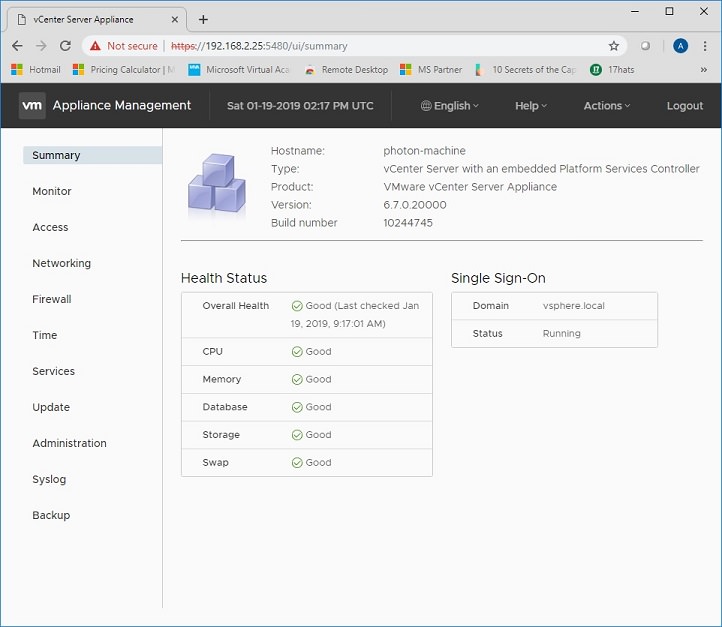
Now to connect to your new vCenter VCSA without DNS..
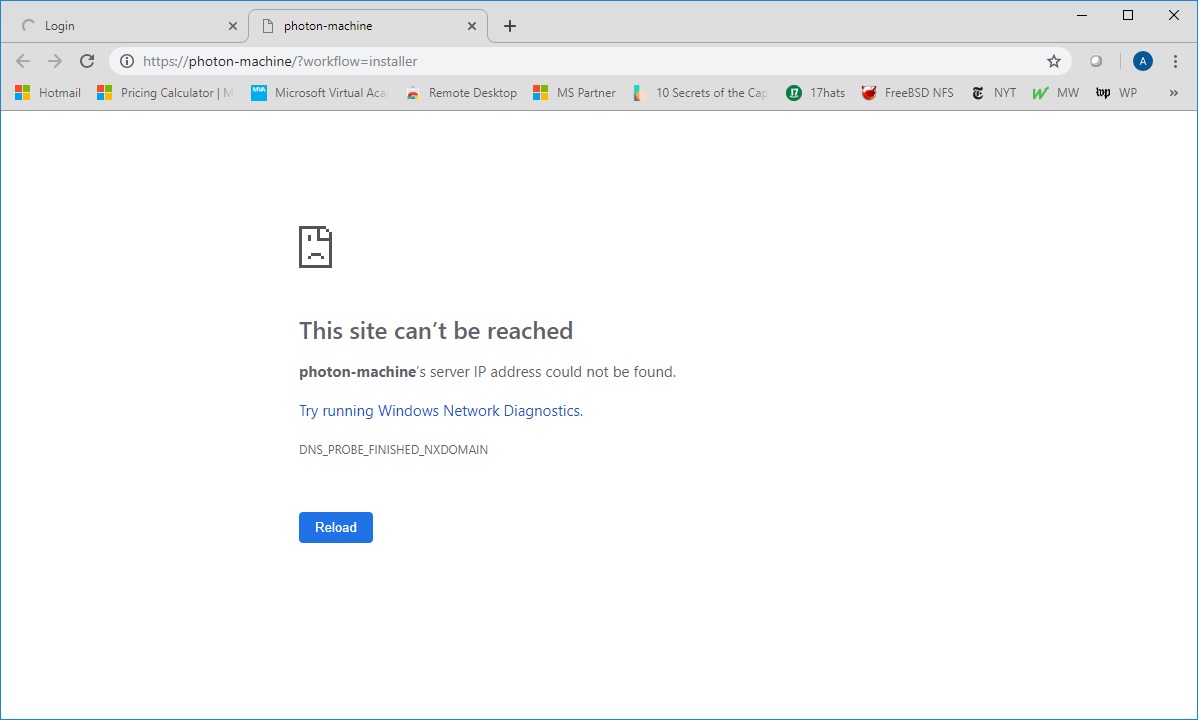
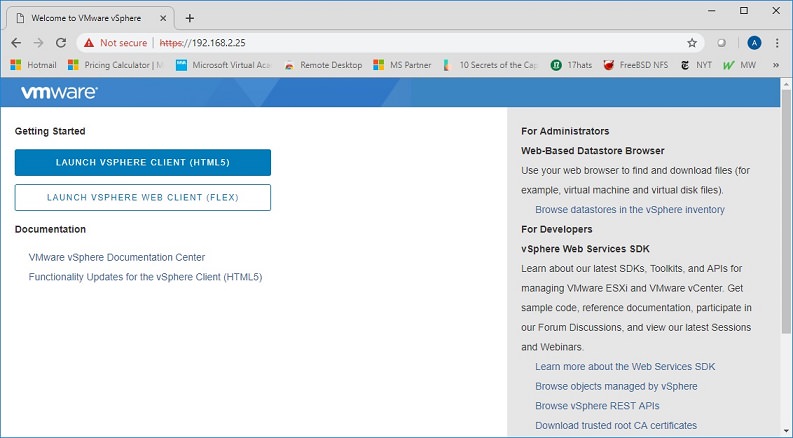
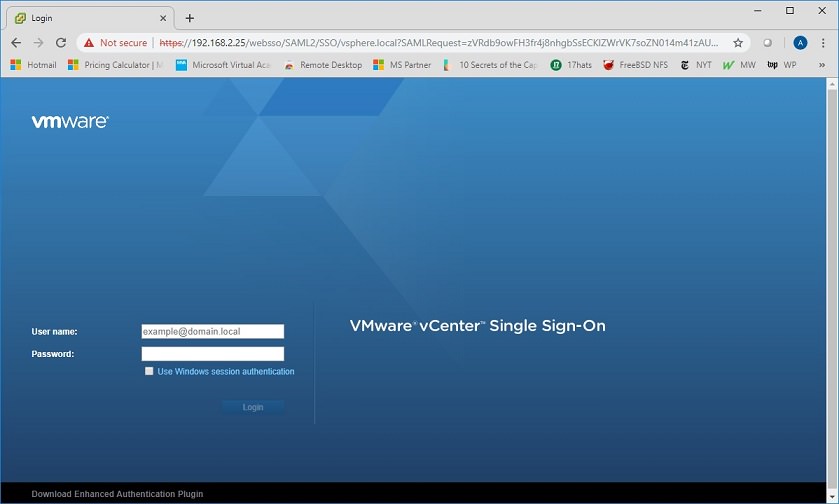
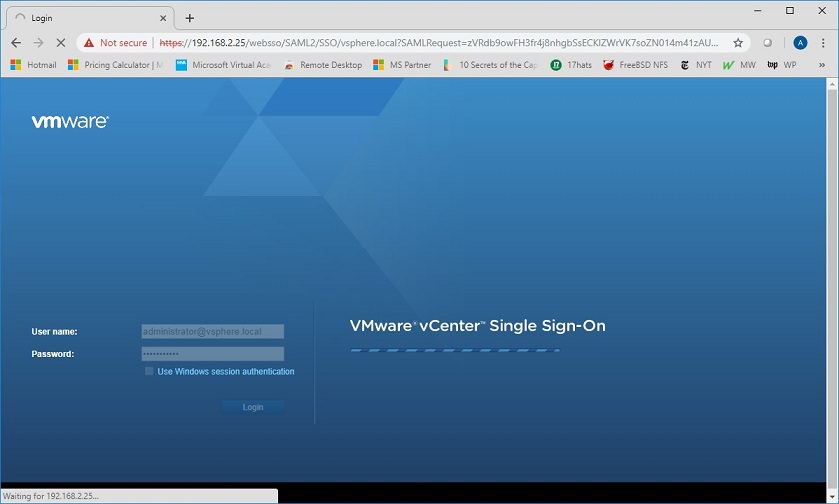
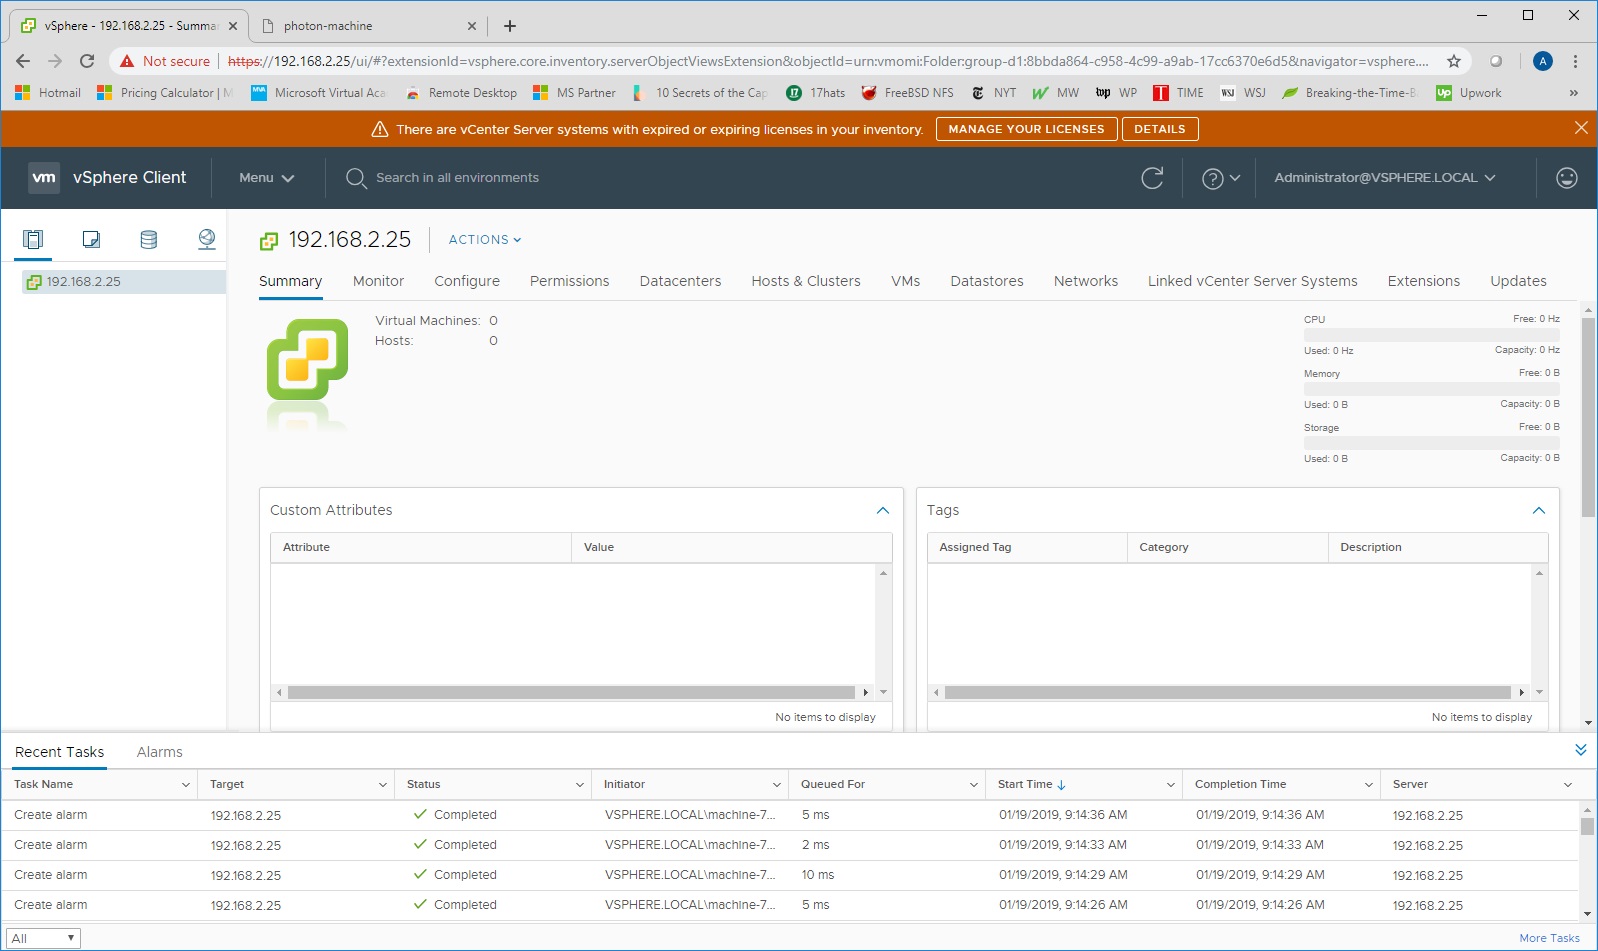
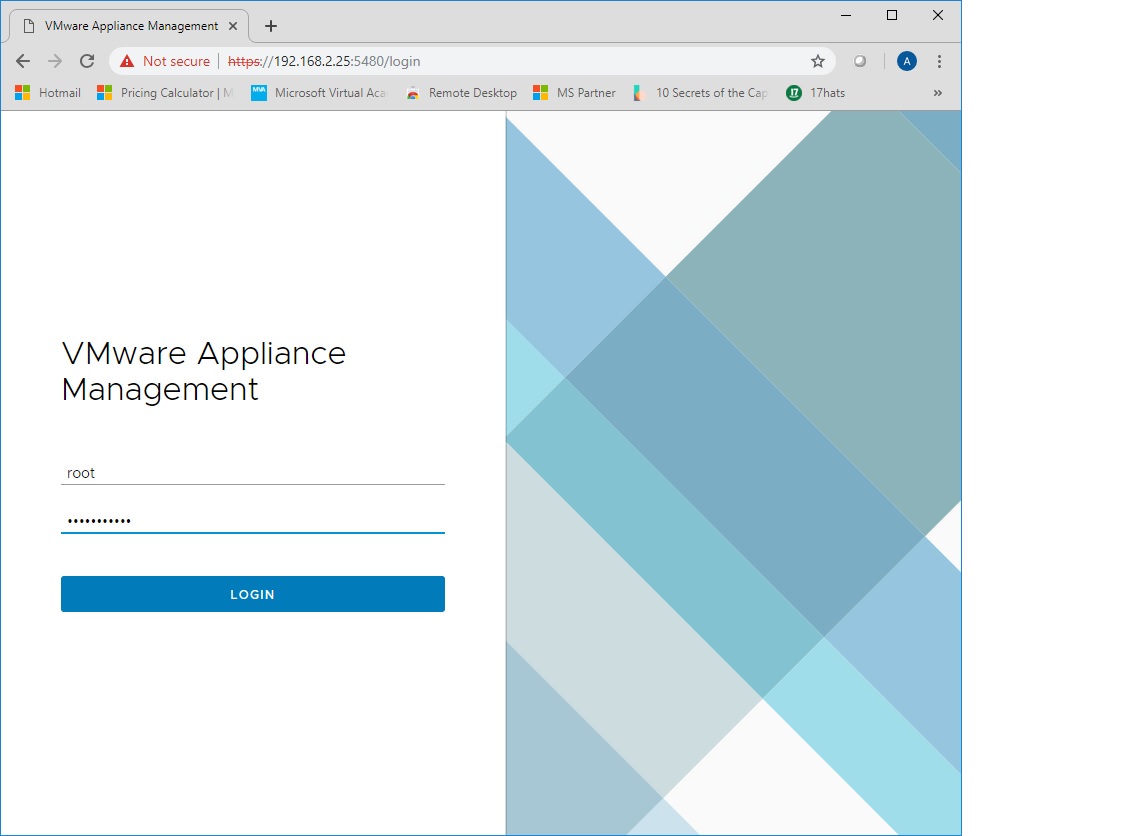
17. As you can see, if you don’t have DNS and just click the link, the page won’t open.18. Change the URL to the IP address of the vCenter server. Now the page displays.19. If you follow the “Launch vSphere client HTML5” link, or simply enter the URL https://vCenter_IP/vsphere-client , the vCenter logon page will display.20. Enter administrator@vsphere.local and the password you set in Step 13. Make sure you have Flash enabled on your browser.21. The vCenter page will open successfully with no DNS.22. How to access the VCSA appliance to perform management functions? Use the URL https://vCenter_IP:5480 and log on with root and the password you set in Step 8.23. Here is the management website for the VCSA
Selfish plug time (sorry!)
Thanks for reading this article! I hope it helps you! If you have tips or feedback, please comment or send me an email so that others can benefit. I am a consultant in the Maryland/DC area in the USA. My specialties are Windows migrations (to 2016 and to Office 365 / Azure), VMware migrations, Netapp and SAN, and high availability / disaster recovery planning. If you would like help with your complex project, or would like a architectural review to improve your availability, please reach out! More information and contact can be found on the About page. – Amira Armond
This looks very helpful. I may have to do this. I am attempting to have a working lab with vcsa 6.7 in my home.. I have a Unifi network, had set a domain, and then in the SSO setup , I DID use an fqdn..funny thing is it was working and now the dns is reporting as vcsa.xyz.com.xyz.com…I have no idea of how ro chang, as SSO only responds to vcx.xyz.com..Idea?
I tried a bogus ip for my DNS on a 6.7 u3 install and it denied me FYI for everyone. I am currently trying my router and ill know if it worked later today I imagine.
Let me know how that works for you. I am trying to set it up and use vrealize orchestrator but it keeps on giving me a lookup service error (even though I did all the steps on the KB ariticle)
So using the IP Address as the FQDN instead of entering a full FQDN will let the VCSa work without a PTR record? This is the issue im having and will try again tonight when i get back to my homelab, and update with findings. This seems too easy to be true ( after messing with Bind9 for the last few days to no avail..)
6.7 U3 didn’t like ip address, or using hosts file with static entries. My solution was to use my Windows Server 2012 R2 virtual machine and enter the DNS entries.
hello how can I do the reverse If I log into the vcenter UI I see the ipaddress but I’d rather see the FQDN . Doing a ssh to the vcenter I see that the hostname is the FQDN . thanks
Thanks for the blog, it helps. I have query might be a simple one but I’m finding it difficult to execute. How to install vCenter 6.5 on a separate server rather than onto a Esxi host, if we install vCenter onto a Esxi host and if Esxi host happens to reboot or shutdown than entire vcenter will be down. I tried installing it on another win server in demo env but it looks for certificate, but when i add esxi host ip or fqdn it works fine. Can you please guide me through for the missing part or vCenter 6.5 onwards it only installed onto esxi host.


April 23, 2019 @ 11:16 am
This looks very helpful. I may have to do this. I am attempting to have a working lab with vcsa 6.7 in my home.. I have a Unifi network, had set a domain, and then in the SSO setup , I DID use an fqdn..funny thing is it was working and now the dns is reporting as vcsa.xyz.com.xyz.com…I have no idea of how ro chang, as SSO only responds to vcx.xyz.com..Idea?
September 12, 2019 @ 8:08 am
I tried a bogus ip for my DNS on a 6.7 u3 install and it denied me FYI for everyone. I am currently trying my router and ill know if it worked later today I imagine.
September 16, 2019 @ 3:08 pm
Let me know how that works for you. I am trying to set it up and use vrealize orchestrator but it keeps on giving me a lookup service error (even though I did all the steps on the KB ariticle)
May 7, 2020 @ 3:57 am
When the 2nd type the Ip, system name. U can check system name is using ip or not. If not change to Ip then u can install it successfully
October 16, 2019 @ 10:57 am
So using the IP Address as the FQDN instead of entering a full FQDN will let the VCSa work without a PTR record? This is the issue im having and will try again tonight when i get back to my homelab, and update with findings. This seems too easy to be true ( after messing with Bind9 for the last few days to no avail..)
October 16, 2019 @ 11:09 am
Well, it worked when I tried it a few months ago. Let us know your experience!
March 9, 2020 @ 12:38 pm
6.7 U3 didn’t like ip address, or using hosts file with static entries. My solution was to use my Windows Server 2012 R2 virtual machine and enter the DNS entries.
August 15, 2020 @ 6:12 am
You can edit the VCSA hosts file, so you don’t need a DNS Server on the local network. Here’s how: https://www.sysadmit.com/2020/08/vmware-instalar-vcsa-sin-dns.html
December 27, 2019 @ 1:01 pm
when install Vcenter 6.7 U1 , I have the error below, some can help me
2019-12-27T17:31:01.789Z – error: Could not get response for get request from url https://OPVTBGOSVCNT01.abj.gos.ftgroup:5480/: Error: getaddrinfo ENOTFOUND opvtbgosvcnt01.abj.gos.ftgroup opvtbgosvcnt01.abj.gos.ftgroup:5480
2019-12-27T17:31:01.789Z – error: VAMI is NOT accessilbe[1]: https://OPVTBGOSVCNT01.abj.gos.ftgroup:5480/, err: Could not get response for get request from url https://OPVTBGOSVCNT01.abj.gos.ftgroup:5480/: Error: getaddrinfo ENOTFOUND opvtbgosvcnt01.abj.gos.ftgroup opvtbgosvcnt01.abj.gos.ftgroup:5480
October 30, 2020 @ 7:35 am
hello
how can I do the reverse
If I log into the vcenter UI I see the ipaddress but I’d rather see the FQDN .
Doing a ssh to the vcenter I see that the hostname is the FQDN .
thanks
April 17, 2021 @ 4:24 am
Thanks for the blog, it helps.
I have query might be a simple one but I’m finding it difficult to execute. How to install vCenter 6.5 on a separate server rather than onto a Esxi host, if we install vCenter onto a Esxi host and if Esxi host happens to reboot or shutdown than entire vcenter will be down.
I tried installing it on another win server in demo env but it looks for certificate, but when i add esxi host ip or fqdn it works fine.
Can you please guide me through for the missing part or vCenter 6.5 onwards it only installed onto esxi host.
Have a nice time.